Sunday, May 29, 2011

More old pics

There have been many, if not most, people who have wondered out loud why I'm working so hard and spending so much time and money on this boat. The short answer is that it's been in the family since it was new in 1980. The long answer is more nuanced and has its roots in the stories I outlined in the first post. To get the point across better I asked the family for old pictures, some of which I have already posted. Recently my sister in-law Denise sent me some pictures from the years when her and Mike lived on Lake Washington and after when they first moved to Redmond. These help show the good times they had with the boat in the last decade up until I inherited it.

 Mike the Captain and the boat lift on Lake Washington

Mike grilling on the fourth of July 2005. This was two years before I would lose that same grill overboard in the violent chop of Seafair.

View of the rear en route to Lake Washington

One of the less than glamorous anecdotes. This is Mike on the right and Geeman on the left rowing back to shore with their skis after they lost the prop. Someone forgot to put the cotter pin back on the bolt to hold on the main prop nut.

And of course the ubiquitous logo on the sides of the rear of the boat. Soon these will be removed and replaced with new lettering painted on.

Sooner rather than later these will be added to with new pictures of the new Phantom ready for 30 more years of good times, crazy launching stories, and summertime grilling. But we will not be losing any more props to the depths.

It's a Family Affair

 A lot has happened in the last two weeks and I will try and distill it all down. Last week after I got all the foam out and the hull sanded down I discovered two wear points that needed immediate attention before I could move on to new stringers and foam. There was a spot under the drivers seat that had worn through a complete layer of fiberglass as well as the lower bow had worn to the point that daylight was showing through. The latter will take a significant gel coat repair on the outer hull in addition to the new glass on the interior.


This was a perfect opportunity for me to practice my glassing technique. I've read a ton on polyester vs epoxy vs vinyl ester fiberglass and all of their various quirks. I ultimately settled on polyester because, quite frankly, it costs a fraction of the other two. I was able to get a five gallon drum of polyester resin  for the price of one gallon of epoxy. However, polyester has many of its own drawbacks. It hardens quickly, requires a lot of prep sanding and cleaning with acetone, and is extremely sensitive to ambient temperature. The temperature and hardening time can be managed with the amount of catalyst used.

So when it came time to prep all my gear for my first two patches I tried to slow the hardening by adding very little catalyst. Problem was I added way too little. It's suppose to be a teaspoon per pint of resin but I only put in about an eighth of a teaspoon. Needless to say all I created was a giant mess. I slathered the fiberglass mat with my failed resin and waited all night for the big fat nothing to happen. So I had to pull it all up, scrub everything down with acetone and start over. The second attempt worked like a charm.


It was now time to get serious about replacing the stringers. This is where Mike and Dad came to the rescue. Mike purchased all the wood necessary for the whole project and Dad came out on Friday and helped me strip all the old interior panels and cut and shape the new main stringer

From there we dry fitted it and I resined the whole shebang to prime it for its fiberglass skin. Yesterday my awesome friend Ira came out and helped for a while. Since he is way handier with motors that I am, I put him on installing the new fuel pump and degreasing the shaft and rudder so they can be painted with a good coat of anti-fouling engine paint.


While he was working on the motor I began the process of laying in the new stringer. This is another example of my lack of experience bit me in the butt. When I was purchasing the resin I was sold a discount "structural putty" for the base and fillets. Word to the wise, don't buy discount anything with the word "structural" in it. The pint did not go very far and was extremely brittle when it hardened. So now I will have to sand it down and use the correct combination of resin and filler that my lazy butt wanted to avoid. Do it right because I do it twice.


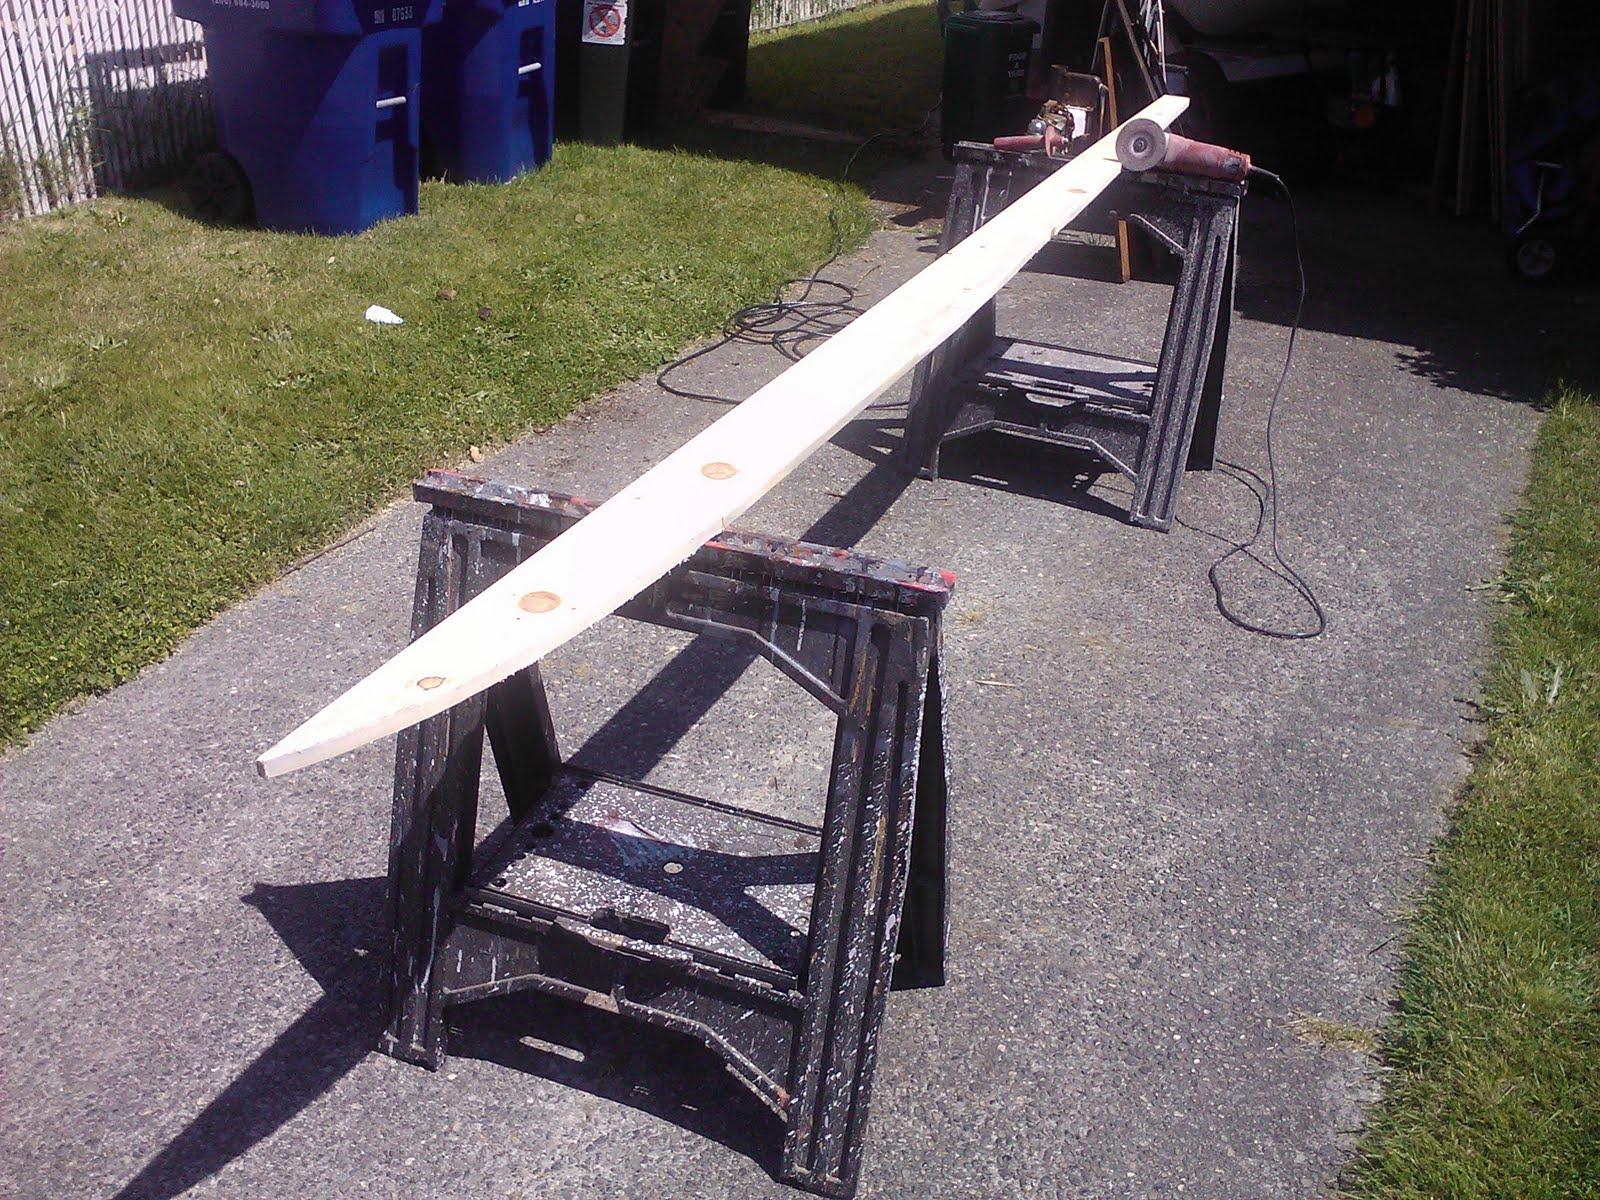
Towards the end of the day Ira and I measured and cut the new deck pieces which will eventually go in after the stringers are replaced and the hull foamed.
Looks pretty damn good doesn't it?


Today I took all of the old ply that Dad and I recovered from the old panels and used them as templates for the new wood. It was messy and time consuming but what about this hasn't been?


After I finished with those I prepped and cut the new bow deck piece. This was particularly challenging because the underside needed to have a sanded bevel in order to fit into the very tight area under the bow seats. Fortunately last year when I was pulling up the old deck I saved this piece for just this moment so I had a template.


As a side note, I have noticed in several areas that dry rot looks a lot like burned wood.
Again, all the more reason why the boat needs this.

With some shoving and grunting I was able to dry fit the new bow piece


All in all, very good weekend. I will have to get the stringer problem under control and get the two side stringers replaced once I do. However as of right now we have all the wood cut and dry fitted which feels pretty damn good. Big thanks to Dad, Ira, and Mike for their labor and financial assistance, couldn't do it without you.

Sunday, May 15, 2011

Big grinding day

This afternoon I spent about four hours grinding and sanding and grinding and chiseling and grinding away at the main stringer, old deck edges, and flotation foam. I started out with my new pry bar hacking away at the foam removing the last pieces before tackling the fiberglass and old wood of the stringer. The foam in the stern that had been under the fuel tanks wreaked of gasoline and I was very glad to be doing this outside with a respirator. After the foam was up it was time to hack away at the main stringer running the length of the boat. The main area and stern were a piece of cake since it was so open and flat. The bow was a different story all together. Since I had decided not to remove the blue top portion of the hull I had to cut holes in it to get all the way down at the rotten wood. So far this has been the hardest step. Getting the old bow pieces dislodged was not only tight but had been heavily resined in when it was built. There was about a half inch of fillet built up around the stringer that I had to grind and chip at for about an hour to get it all out. After I had the wood out I switched to a sanding disk on the grinder and sanded the whole length flat in preparation for the new stringer I will be laying in next week. In addition to the work on the stringer I also cut the bilge area back to the newer wood that had been installed when the transom was replaced a few years ago by Mike. All in all, it was an extremely successful day

Here are a few pics of the work done today:

This is the pile of foam and other detris early on in the day.

This is an example of what the old deck looked like. And this is one of the better pieces.

Nice and smooth. Like a babies fiberglass butt.

Looking rear at the bilge area, all ready for the new deck


You'll notice that the two side stringers are still in place. I am leaving those in for working structure till I get the main stringer laid. It may not be necessary but better safe than sorry.

Thursday, May 5, 2011

Current State

Over the weekend I took some time to prepare to prepare the garage for some work. As this spring has been the coldest on record the weather isn't real conducive to serious boat work. However, I was able to clean a little and get the hull emptied of gack I was storing in it over the summer. Below are some pictures of where the work left off last summer. I was gung ho to get all the boat finished then but July-September was nuts with work.

So here is where I left off:

This is sitting in the stern looking forward. The stripped console is the most disturbing

 Here is a look at the floor. The fiberglass sticking up is the remnants of the old main floor stinger which will ultimately be replaced with a fancy new plywood spine

Detail of the stern with chunks of the old foam removed.

Shot looking back towards the bilge area. All of this foam and decking will be stripped and replaced

As you can tell, there's a ton of work to do. But it should go quickly once it's warm enough to lay up fiberglass (60+ degrees for more than an hour or two). My hope is to be able to get all of this old crap stripped out on Sunday the 15th. We'll see....